How to find and fix spelling issues
To become familiar with Silktide, we highly recommend all users master the fundamentals of the spelling test. This is one of our most widely used tests, is relatively simple, and lays the groundwork for using more sophisticated features elsewhere, like SEO or accessibility.
Before you start
Make sure you have tested a website, and view it inside Silktide. Almost without fail, at least one unrecognized spelling will be found for any website with 100+ webpages.
Your user account will need to be at least a contributor to mark spellings as approved or ignored.
Getting to the spelling screen
Click Content > Spelling to reach the spelling screen.
The spelling screen
The spelling screen incorporates many common features used throughout Silktide. Once you understand these, you will know your way around many other screens:

- At the top two panels count how many unrecognized spellings there are (“27 unrecognized spellings”), and how many pages have an unrecognized spelling.
- A progress graph shows how the number of unrecognized spellings has changed over time.
- Two tabs allow you to toggle between seeing the individual “Spellings”, or the list of “Pages” with spelling issues on them.
- A table lists the unrecognized spellings. The table is sorted, with more likely and severe spelling errors appearing at the top, and less likely or severe spelling errors appearing at the bottom:
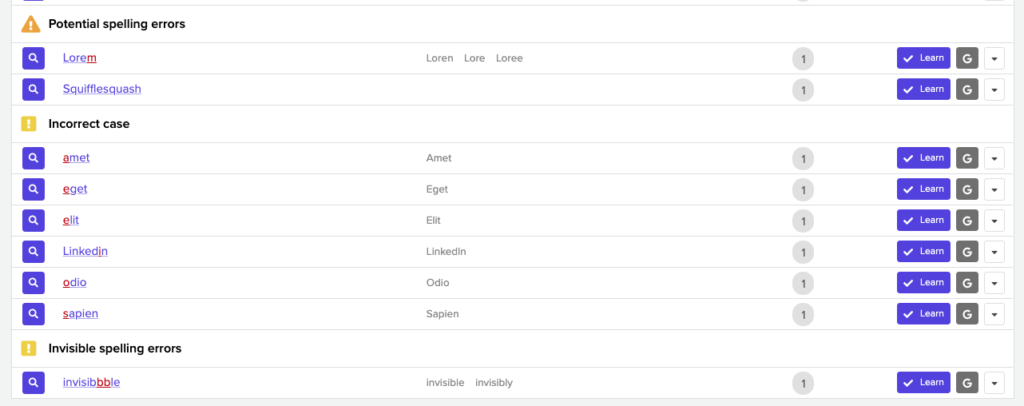
- A blue button with a magnifying glass on it appears next to each unrecognized spelling. Clicking on this button will show a page where this issue occurs (see below).
- Hovering your mouse over an unrecognized spelling will show a brief excerpt of where that spelling was found.
- Suggested corrections are shown in grey next to each unrecognized spelling.
- The number of times a word was found is also shown.
- A blue Learn button allows you to teach Silktide where a spelling is correct. See “Approving and ignoring spellings”, below.
- A grey G button performs a Google search for the unrecognized spelling. This can be useful if you are unsure if a word really is correctly spelled – Google will usually say if it is not, or point to examples if it is.
Viewing individual issues on a page
If you click on the blue magnifying glass, or on a spelling itself, you will be shown a page where that spelling was found, like so:
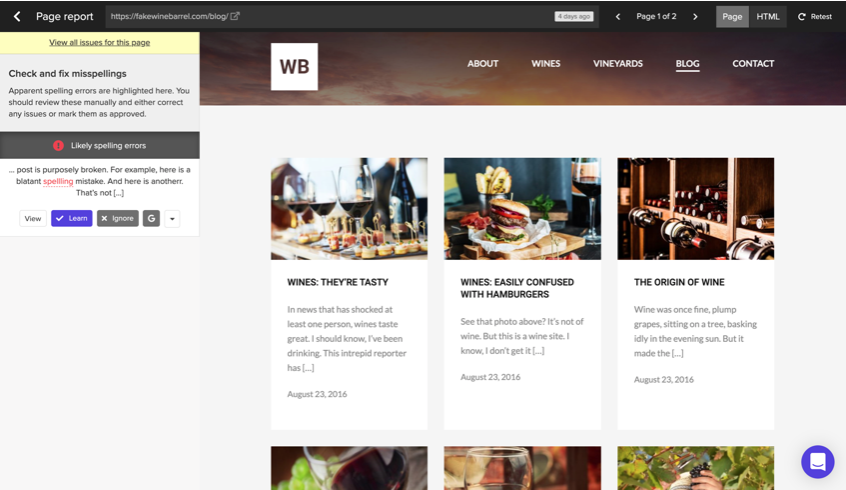
This screen is divided into three panels: navigation at the top, issues on the left, and the original webpage on the right.
The controls at the top are always the same, and important to know:

- The back arrow at the top left exits this view, and goes back to the previous screen.
- The web address of the page is shown in the middle. Clicking on this address will open the current version of that webpage, as it appears now on the public internet.
- To the right of this is the number of the page you are viewing, and the number of pages in total with this specific issue on. In the example above, we are viewing “Page 1 of 2”, which means this unrecognized spelling appears on two pages. You can use the previous and next arrows to move between pages. You can also click on the text here to view a list of all the affected pages and browse between them.
- The Page button views the page, as it appeared when it was downloaded. This is the default view.
- The HTML button views the HTML code for the page. This is the computed source for the page. Developers will often find this useful, especially for more complex issues.
- If a pencil icon is shown, clicking it will edit this page in your CMS. You must be integrated with your CMS for this to be shown.
- The Retest button will retest the current page. This typically takes around 20-30 seconds and you can continue to use Silktide in the meantime.
Viewing issues
Issues (in this case, unrecognized spellings) are always shown in the panel on the left:
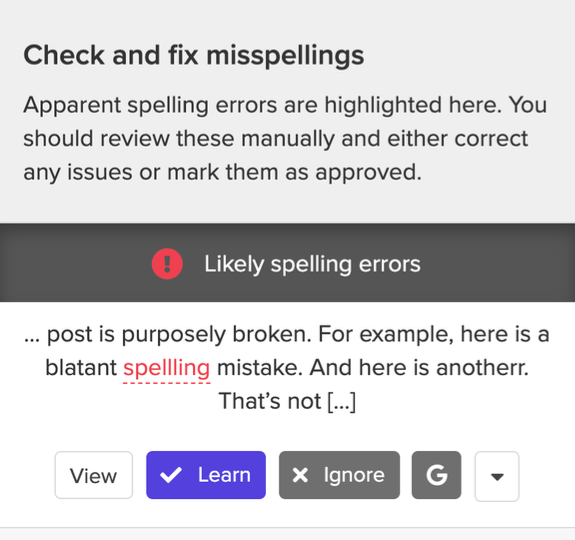
Click on thee View button below an issue to see it highlighted on the page to the right. In some cases, the issue may not be something that can be shown visually (e.g. a spelling error inside a meta description) – in these cases you will be shown the HTML view of the issue instead.
Fixing issues
If Silktide has been integrated with your CMS, you can click on the pencil icon in the top-right corner to immediately edit the affected webpage:

If you don’t see this icon, you will need to find the page yourself, using your CMS.
You should fix the issue in your CMS and publish it. If Silktide has been integrated with your CMS, the updated page will be automatically retested for you. Within 20-30 seconds you should see if the issue has been fixed. There’s no need to wait for this to happen – you can move onto another issue and Silktide will do this in the background.
If you’re not integrated with your CMS, you can retest the updated page manually. Click on the Retest button (above) and Silktide will update the page within 20-30 seconds in the same way.
Approving and ignoring spellings
All issues can have buttons beneath them, allowing you to approve or ignore the issue. In the case of unrecognized spellings, you see buttons like this:

These buttons allow you to make decisions about an issue. In this case, you can decide to learn a spelling if it is correct. Or you can choose to ignore it if the spelling is intentionally wrong (e.g. if you were quoting someone who had made a spelling mistake).
Clicking the button with the downwards arrow at the end will show more options:

Here you can make more obscure decisions. You could ignore this spelling for just this page. Or you could ignore every single spelling error on this page – handy if you know the page is something you don’t want to check, like a Shakespearean play.
When you make a decision, it takes effect immediately. All your results are updated within a second or so, including your scores. So if you learn or ignore something, there’s no need to re-test afterwards.
Viewing and reversing decisions
If you approve or ignore a misspelling, you are making a decision. A complete list of these decisions can be seen by clicking on Decisions in the left-hand side menu.
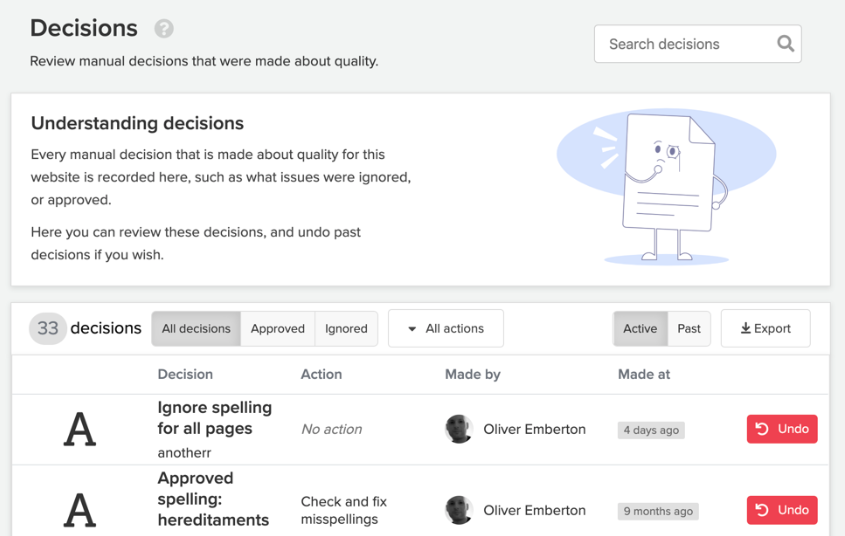
Here you can see who made what decisions and when. You can filter decisions by what they affected and by what type they were.
Decisions can be undone at any time. Find the decision you wish to revert, and click on the red Undo button next to it, on the right-hand side.