Silktide API for CMS integration
Use this API to link your CMS to Silktide if you have a CMS which is not already supported by Silktide.
Overview
Silktide is a website governance platform which monitors websites for a range of issues – like broken links, inaccessibility, and spelling errors. When integrated with a CMS, the following two enhancements become possible:
- Publishing – publishing a page in the CMS tells Silktide to test the affected URL(s) immediately.
- Editing – users can click a button inside Silktide to edit a specific page in the CMS.
Authentication
Silktide provides an API key to authenticate calls to the API for CMS’. To obtain a key:
- Login to Silktide as a user permissions to manage the website you wish to link to (for example, an account owner).
- View the website.
- Click Settings > CMS.
Depending on the permission of your user, you will then be offered one or two API keys that you can copy:
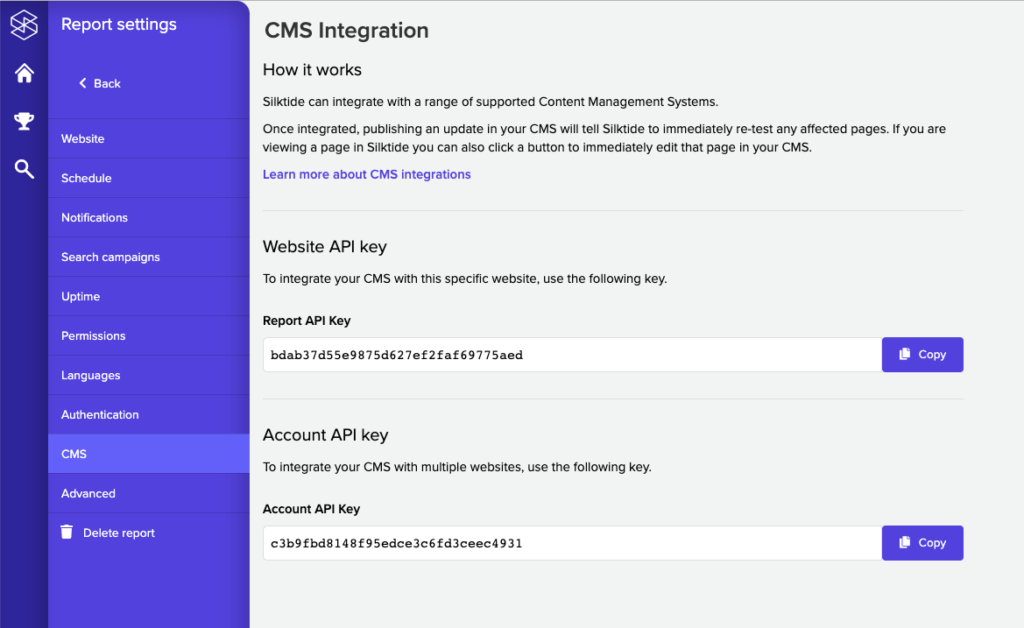
- The Website API key grants access to integrate with the current website only.
- The Account API key grants access to integrate with all websites on the current account. You will only see this if you are the account owner.
An API key is a case-sensitive 32 character alphanumeric string. You can test your API key by making a HTTP POST to the following endpoint:
URL: https://api.silktide.com/cms/test-key
apiKey– your API key
This will return a HTTP 200 code if successful, or 403 otherwise.
There is no need to implement this endpoint in your integration, it is just useful for testing authentication.
1. Publishing
When a page is added or updated, the CMS should be made to the Silktide platform that provides the URLs of the pages that have been changed.
To do this, make a HTTP POST as follows:
URL: https://api.silktide.com/cms/update
apiKey– your API keyurl– a URL you want to update ORurls– an array of URLs you wish to updatedeferRetestSeconds– number of seconds to wait before retesting the page (optional)
For example:
{
  "apiKey": "dbb6936748454b13fe7f56660a09c027",
  "url": "http://example.com/page"
}
Requests are queued and processed asynchronously, so you should expect a near instant successful response (HTTP 200), but any webpage(s) you sent to may take 20-30 seconds to retest in Silktide.
2. Editing
Silktide needs to know what URL users should visit to edit a given page in a CMS. For example, to edit a Post in WordPress, you need a URL like:
https://example.com/wp/wp-admin/post.php?post=123
In some CMS’ this will be trivial to derive, and in others it is intractable. For example, some CMS’ lack the concept of a ‘page’, which makes it impossible to link to an editor for that page.
For each page published by your CMS, add a dynamic <meta> tag which tells Silktide how to edit that page:
<meta name="silktide-cms" content="...">
The content of this meta tag is a Base64 encoded JSON object of this form:
{
  "cms": "Wordpress",
  "editorUrl": "..."
}
Where:
cmsis a free-text descriptor of the current CMS, which may be shown to the user inside Silktide.editorUrlis the URL that someone should visit to edit the page.
This allows users of Silktide to click the Edit button on the page inspector, and get taken to the page editor inside the Content Management System to fix the reported issues.
As Base64 is trivial to reverse, you should not use this approach to encode any URLs which might authenticate a user, e.g. those containing a token or username or similar. If this is a concern, you may optionally encrypt this data.
Advanced: adding encryption
You may optionally encrypt your JSON data before it is Base 64 encrypted, using AES-256-CBC. For example, in PHP:
// Create your $data to encrypt, e.g.
$data = [
  "cms" => "Wordpress",
  "editorUrl" => "...",
];

$ivlen = openssl_cipher_iv_length('AES-256-CBC');
$iv = openssl_random_pseudo_bytes($ivlen);
$ciphertext_raw = openssl_encrypt(
  json_encode($data),
  'AES-256-CBC',
  $key,
  OPENSSL_RAW_DATA,
  $iv);

$hmac = hash_hmac('sha256', $ciphertext_raw, $key, true);
$ciphertext = base64_encode($iv.$hmac.$ciphertext_raw);

// $ciphertext now contains the content for your meta tag
Testing your integration
Once your integration is ready for testing:
- Obtain an API key as explained above (under Settings > CMS) and ensure your integration is using it.
- Deploy your integration inside your CMS.
- Ensure that if any metadata or code changes were made to your public webpages, that they are not cached in an old state. Flush the website’s caches if necessary.
- Ask Silktide to retest the website.
- Inside the website report, click Information > Pages and click on any page to view it in the Inspector.
- An Edit button should appear at the top-right corner of the screen, if the Editing part of this integration was successful. Clicking on this icon should open the CMS in a new tab, editing the current page.
- If you publish a page in your CMS and then immediately switch into Silktide, you should see a blue progress banner appear at the top of the screen, while the updated page is tested.
If you’re experiencing difficulties with an integration, please reach out to us via the live chat built into your Silktide account.
Troubleshooting
- Make sure your API key has permission to access the website(s) you are integrating with. If you use an Account API key this won’t be a problem.
- You can only test URLs that comply with the allowed and denied URLs for the website(s) you are testing. This means if your website is defined as say example.com you can’t test pages from another-example.com. They will be silently ignored.
See more
- How to find your Silktide API keys
- How to integrate Silktide with WordPress
- How to integrate Silktide with Drupal
- How to integrate Silktide with Craft CMS 3
- How to integrate Silktide with Sitefinity
- How to integrate Silktide with Drupal 7
- How to integrate Silktide with Umbraco
- How to integrate Silktide with Terminalfour